




Direct answer: an AI workflow for ecommerce teams
Short answer: use a workflow tool that chains a language model to an image model, so one product sheet turns into a batch of finished images instead of one hand-written prompt per photo. In RelayMe you build that once: an LLM step expands each SKU's name, selling points and target style into a complete image prompt, an image step (Nano Banana, Nano Banana Pro or GPT-Image2) renders it, and the same template is re-run for every new SKU. The batch cost is simply the per-image price added up: on the current sale tiers that is 20 credits (about US$0.02) per Nano Banana image or 100 credits (US$0.10) per Nano Banana Pro or GPT-Image2 image, so 100 white-background main images cost roughly US$2 to US$10 in model fees.
If your team produces main images, lifestyle shots and campaign assets for dozens of SKUs every week, outsourcing or manual retouching scales linearly with your catalog, while a reusable workflow does not. For one-off, hand-polished creatives, a traditional retouching process may still serve you better.
Make one approved product image before a batch
Prepare one product’s reference photo and a short brief: product identifier, material, colors, label text, desired scene and aspect ratio. Use images you have permission to process, and keep the same fields when moving to the next product.
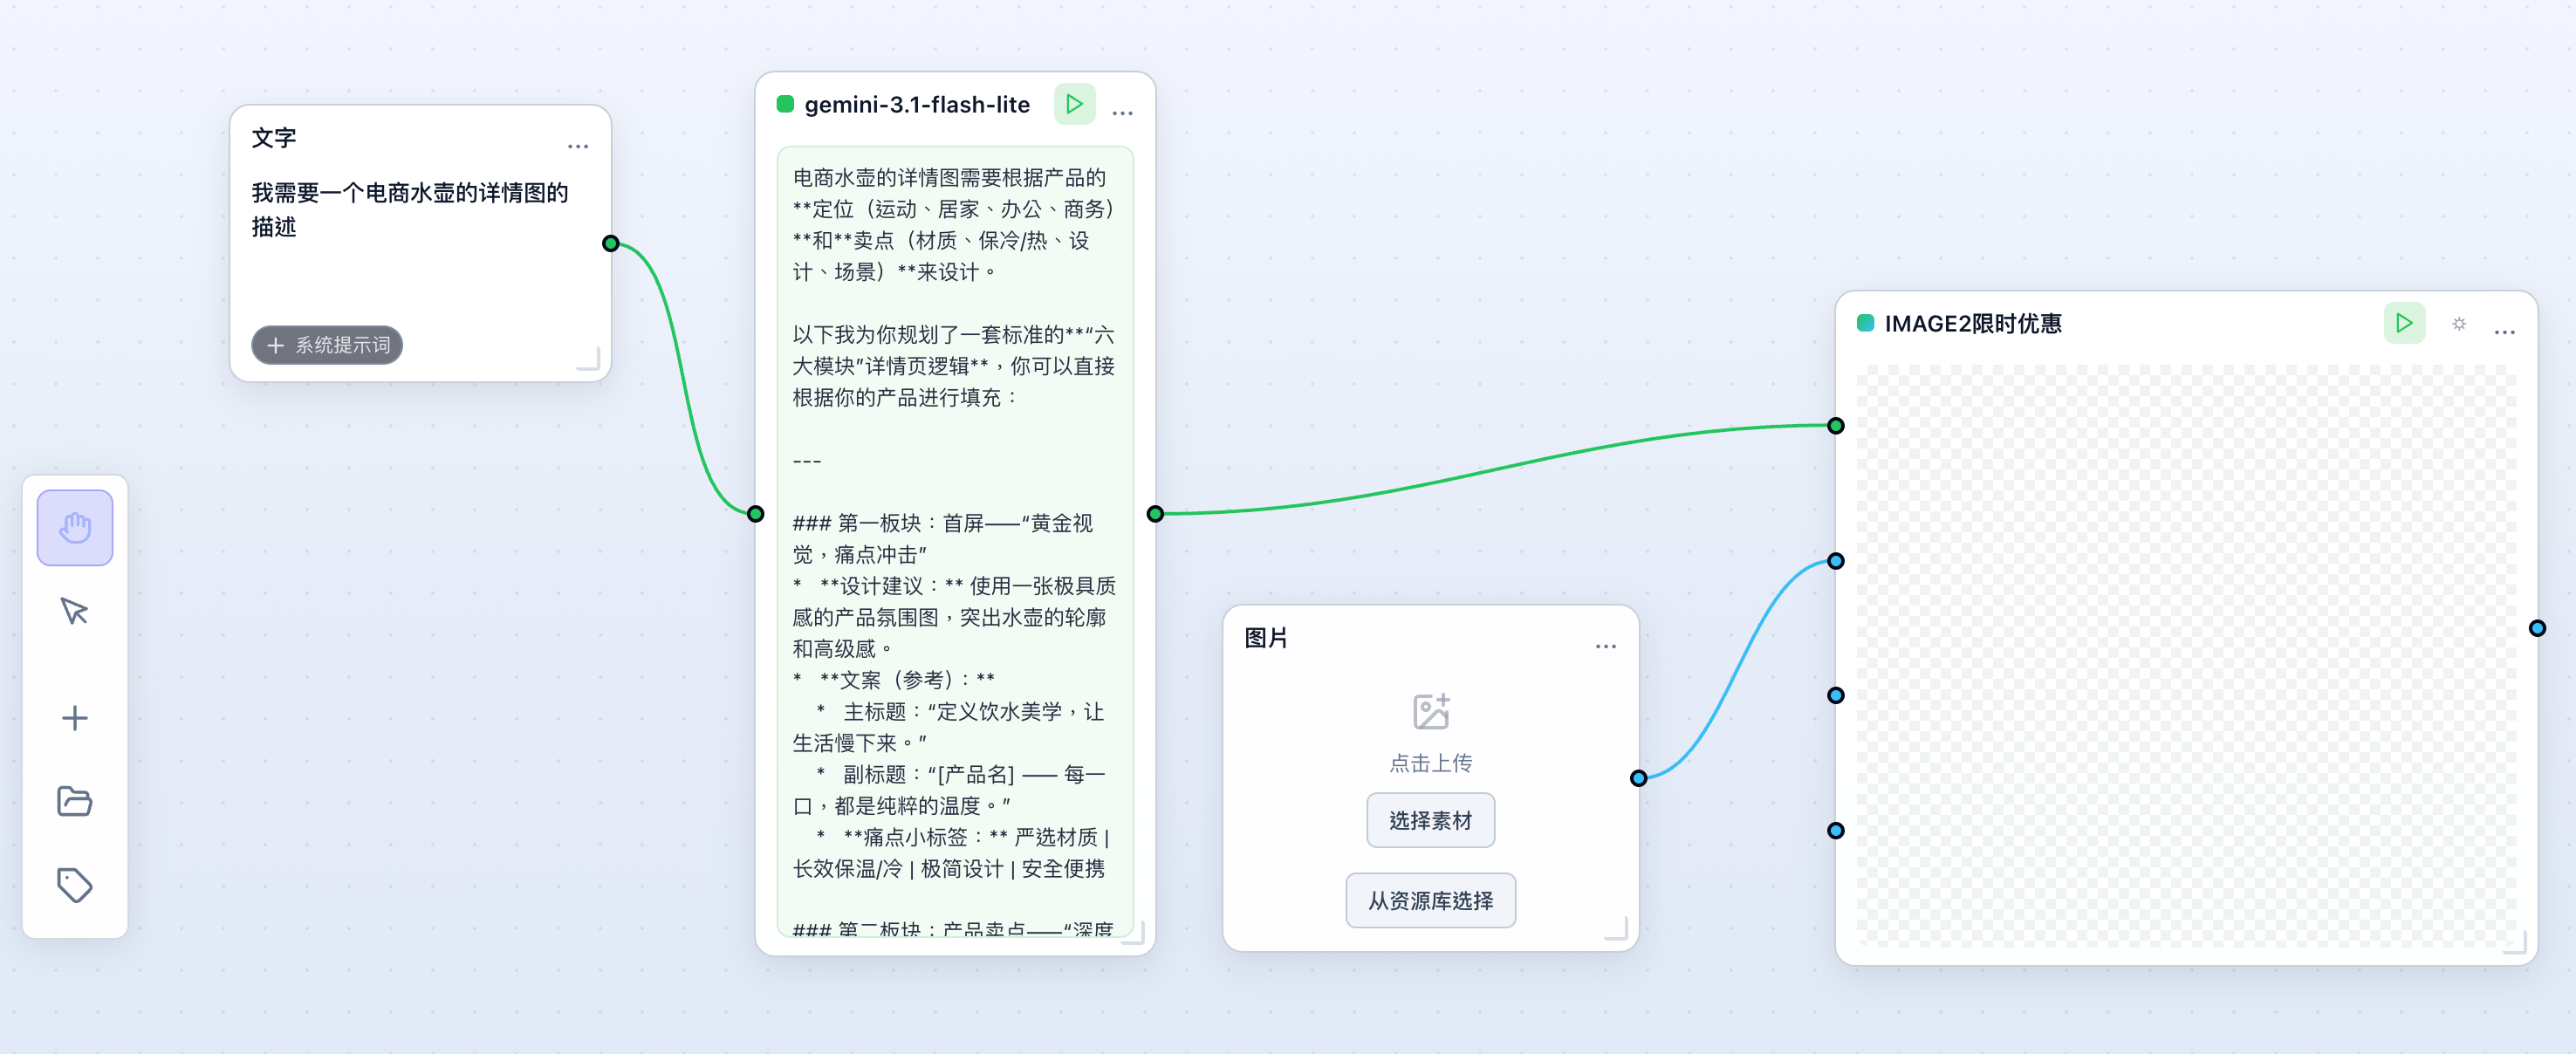
Use the text → LLM → image pattern below for the prompt. Connect the product reference separately when the selected model supports it. The existing canvas illustrates the connections; its image output is empty and is not a finished product-image example.
Review the first output against the original: label text, silhouette, colors and scene. Repeat the workflow with the next input only after checking those details, and keep the actual credits and task result for each run. Reusing a workflow does not imply a catalog import or unlimited parallel execution.
What a batch of AI product images costs (RelayMe pricing, September 2026)
RelayMe bills every image in credits, and 1,000 credits is roughly US$1. Per image on the current sale tiers: Nano Banana at 1K, 2K or 4K costs 20 credits (about US$0.02); Nano Banana Pro costs 100 credits at 1K or 2K and 200 credits at 4K (US$0.10 to US$0.20); GPT-Image2 costs 100 credits at 1K, 2K or 4K on the special-offer channel, or 200, 350 and 600 credits at 1K, 2K and 4K on the standard channel. Standard, non-sale Nano Banana is 80 credits per image. Prices change; the live table is on the RelayMe pricing page.
In batch terms: the US$19 Starter plan includes 20,000 credits a month, which is 1,000 Nano Banana images or 200 Nano Banana Pro images at sale prices. Basic (US$32, 35,000 credits) and Pro (US$90, 110,000 credits) scale that to 1,750 and 5,500 Nano Banana images a month. Monthly plan credits reset on the billing date, but top-up credits never expire, so a seasonal catalog refresh can be bought once and used over several months.
Re-run waste matters more than the list price. Budget 20 to 30 percent extra for regenerations when you start a new category, then use task history to see which templates need the fewest retries and standardize on them. For scale: in a real production run the product image that seeded a 4-second ad clip cost 20 credits while the clip itself cost 600, so the image stage is a rounding error next to video — an argument for generating more image candidates per SKU, not fewer.
For the exact node connections and a reusable instruction, follow the LLM prompt workflow tutorial.
Step 1: define the workflow logic
Start by fixing what one workflow should produce: white-background main images, lifestyle scenes, or promotional composites. Lock down the inputs — product name, selling points, target style, aspect ratio — as workflow variables. The more structured the input, the more stable batch results become.
Keep one workflow per output type instead of mixing main images and scene images in a single flow; separation lets you tune prompts and parameters per image type and makes failures easier to trace.
Compare Nano Banana Pro and GPT Image 2 for model settings and credits before choosing a model for your own workflow.
Step 2: chain text and image generation
In a RelayMe workflow, the output of a language model step can feed directly into the next image generation step. A typical setup: the LLM expands product details into a full image prompt covering subject, environment, lighting, and composition, and the image step renders from that prompt.
Operators only fill in product details and never need to write prompts themselves. For categories where prompt quality is critical, add a manual confirmation step before rendering.
Once a still image is approved, the image-to-video guide explains the next stage and its dated worked example.
Step 3: use reusable templates
Once a workflow runs well, save it as a template so teammates process new SKUs with identical steps and parameters, keeping batches visually consistent. The RelayMe template library also ships ready-made product image templates you can copy and adapt.
When new products arrive, replace only the product fields and leave the structure untouched. When the style needs to change, duplicate the template into a new version so in-flight batches are unaffected.
Step 4: improve with task history
Batch generation accumulates a task record. Review the history regularly to see which prompt patterns yield the highest usable rate and which parameters trigger re-runs, then fold those findings back into the template.
A practical routine: each week, pick the image type with the lowest usable rate, change a single variable such as the lighting description, and compare the next batch. As templates iterate, manual screening time drops and new teammates can start from the latest template directly.